Luke Genoyer, writer and sales analyst

How to Determine the Call Source?

We offer two included features to determine that a call is coming from your virtual business number, as opposed to from your cell phone:

  • Introduction Prompt
  • Caller ID

Either feature will enable users to understand the call source and answer calls more professionally. Additionally, bot features can be used simultaneously.

Introduction Prompt

This “one-way” prompt is played to the person answering the phone at the start of the call. The caller will not hear the prompt. Administrators can upload a pre-recorded prompt or record one from the control panel. The prompt will be whispered to only the call recipient at the start of the call, during which time the caller will hear silence.

  • Example: “Call from my business line” or “Call from my French phone number.

Introduction prompts, or call whispers, are typically suited for business use cases with a larger scope. For example, if a business is managing phone numbers across multiple campaigns, countries, and languages. It will help agents understand how to answer the call and respond appropriately.

Learn how to set up an introduction prompt in this guide.

Caller ID

Our system also allows administrators to customize the caller ID for incoming calls: the Call Forwarding Number or the actual caller ID. By default, the caller ID presented is usually that of the caller. For example, if 561-555-5555 dials your business number, 561-555-5555 will be displayed on the incoming caller ID by default.

However, under certain circumstances, it may be more beneficial that the caller ID displayed is your own Call Forwarding Number so that you know where this call is coming from and handle it differently. With this setting enabled, people answering calls can save the business phone number in their phones and know how to answer the call.

To customize the inbound caller ID, follow these instructions:

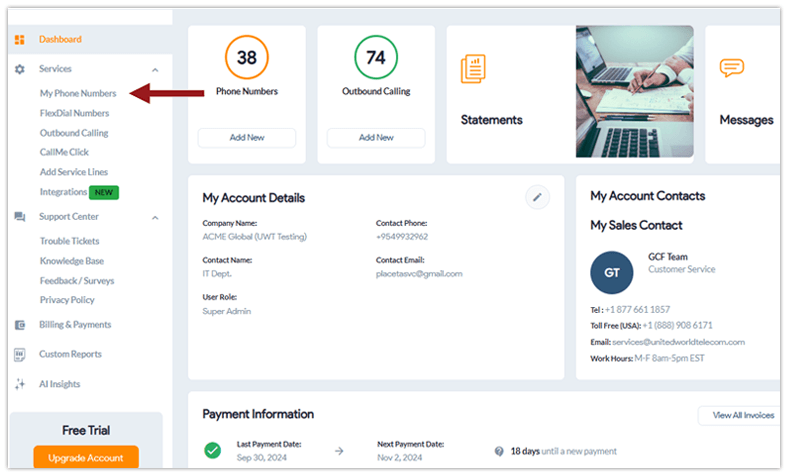
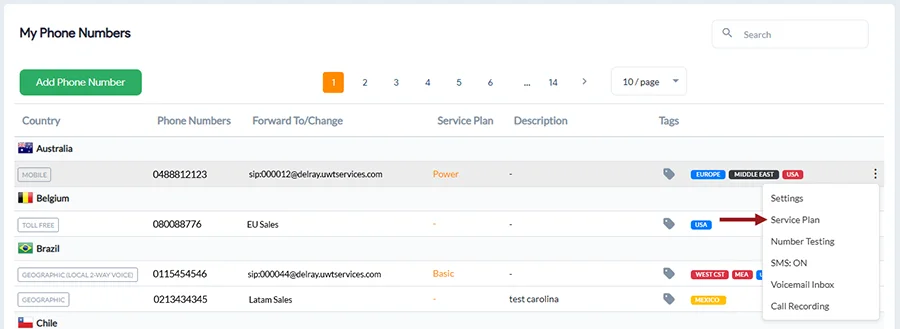
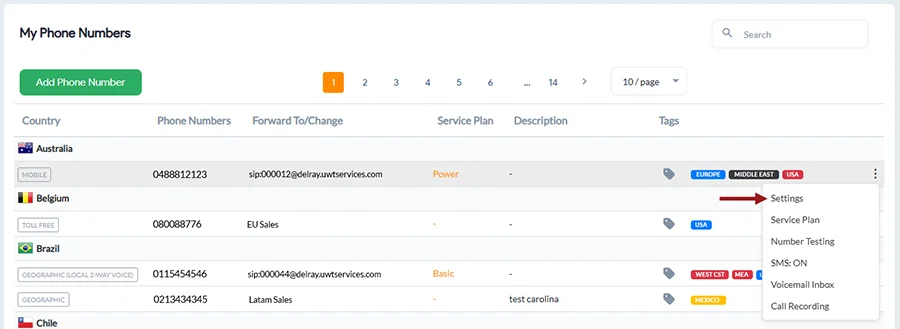
  1. Log into the control panel and navigate to the My Phone Numbers page.
  2. Click on the phone number underneath Forward To/Change for the line you wish to modify the incoming caller ID.
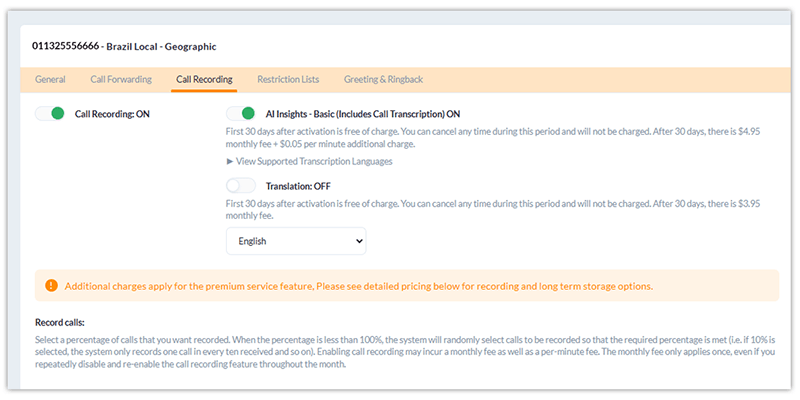
  3. Under the “Basic” tab, you will see a section for Caller ID on the right side (underneath Intro Prompt).
  4. You can show the “Actual Caller ID” (of the person calling) or the Call Forwarding Number (your virtual business phone number).
  5. Click on Save Changes.


How to Set Up an Intro Prompt?

Our introduction prompt feature enables call recipients to understand the call source. This prompt can be played when you answer a call to inform you of the source of this call, the campaign name, etc. If you’re forwarding calls to a general line or a person’s cell phone, knowing how to greet the caller can be very beneficial.

Your caller will not hear this prompt; he/she will hear silence while this prompt is played to you.

  1. After logging into the control panel, navigate to the My Phone Numbers page.
  2. Click on the phone number underneath Forward To/Change for the line you wish to add an Intro Prompt to.
  3. Click Call Forwarding and under the Basic tab, you will see a section for Introduction Prompt on the right side.
  4. You can either upload or record your intro prompt (note: we recommend a short intro prompt, which should be between 2 and 3 seconds).
  5. Click on Save Changes.

How to Set Up MicroSIP

MicroSIP is a lightweight and open-source softphone application. It supports VoIP using Session Initiation Protocol (SIP). MicroSIP is popular with users because it is free, easy to use, consumes minimal device resources, and enables high-quality audio with numerous VoIP providers.

This guide will teach you how to configure your United World Telecom service with the MicroSIP softphone on a Windows device.

Prerequisites:

  • An active account with United World Telecom.
  • VoIP/SIP credentials (i.e., the UserID and Password for the lines you wish to use). Learn how to find your credentials.
  • MicroSIP must be installed on your machine.

MicroSIP Setup Instructions

As mentioned in the prerequisites, MicroSIP must be installed on your device.

You can download the app on MicroSIP’s website. After downloading the app, launch the installation process and keep clicking next. The installation process is relatively quick.

Once the app is launched, you must connect your United World Telecom account to use it.

Step 1: Open your MicroSIP app, go to MenuAdd Account

Step 2: Fill out the information as follows and click save:

  • Account name (optional): this can be named whatever you want. In most cases, we recommend using your User ID.
  • Username: this will be the UserID of your associated outbound line.
  • Domain: mysipaccount.net or asia.mysipaccount.net
  • Password: this will be the password tied to your outbound line.
  • Transport: Auto

Step 3: Once set up, you will see a green icon in the bottom left that says Online.

Step 4: If the green icon says Online, then you are ready to start making and receiving calls.

And that’s it! Once this process is complete, you should be able to use MicroSIP.

Softphone Integrations

We support integrations and connectivity with dozens of popular softphones, CRMs, help desks, and other PBX systems. Our services can be used with many third-party systems for incoming and outgoing calls.

However, while we support MicroSIP connectivity, we generally recommend that users install our in-house GCF Softphone.

How to Set Up and View Sentiment Analysis?

The call sentiments feature streamlines call analysis and reduces time spent manually reviewing call transcriptions and summaries.

This feature can be used to understand the overall sentiment or mood of a business phone call, which enables businesses to gain a deeper understanding of the quality of interactions over the phone.

Call sentiments can be found in the AI Insights dashboard within your control panel.

How to Set Up and View Sentiment Analysis?

To get started with our call sentiments feature, you must enable AI Insights and call recording within your account. Call sentiments are included with the AI Insights feature and can be accessed for each line with AI enabled.

1. Click My Phone Numbers from the left-hand side of the dashboard.

select my phone number

2. Click on the Recording  icon for the service line that you would like to record calls.

3. You will first need to activate Call Recording. Toggle the menu option to the right from Status Off to Status On.

call recording ai insights

4. Then, turn on the AI Insights – Basic. This includes Call Transcription, Call Summary, and Sentiment Analysis.

Note: You can also add Call Translation below to automatically translate call transcriptions into your desired language.

5. Click Save Changes to confirm your request.

You will now have access to the AI Insights tab in the left-hand menu.

Call Sentiment Types

Global Call Forwarding will display an image related to each sentiment type, depending on how the call went.

There are five types of sentiments:

  • Neutral
  • Slightly positive
  • Mostly positive
  • Slightly negative
  • Mostly negative

sentiment analysis icons

How To View Call Sentiments From The AI Dashboard

Follow these instructions to view call sentiments from the AI Insights Dashboard:

  1. Click AI Insights on the left navigation bar.
  2. Choose the line where you’d like to view call sentiments and apply relevant filters. Users can apply filters to view calls with specific sentiments.
  3. Click on Display Report.
  4. View the call sentiments in the Sentiment column.
  5. Call sentiments can be organized from most to least positive or negative.
  6. Click on Summary to gain further insights into a particular call and understand what went well or could be improved.

ai reports with sentiment

Have questions? Contact your account manager today or chat with us online.

FAQs

  • Why can’t I see sentiments for all my calls?

You will only see call sentiments after the AI Insights and Call Recording features have been activated. Call sentiments are only available for lines with call recording and AI Insights enabled.

How to Set Up and View Call Summary?

The Call Summaries feature enables quick insights into business phone calls by summarizing each transcribed call.

By using call summaries, managers, administrators, and individual contributors can understand call transcripts at a glance by viewing a summary of the call. The call summary consists of a few sentences summarizing each call’s contents.

Call summaries can be found within the AI Insights tab in your control panel.

How to Set Up and View Call Summary?

To get started with our call summary feature, AI Insights must be enabled within your account. Call summaries are included with the AI Insights feature and can be accessed for each line with AI enabled.

1. Click My Phone Numbers from the left-hand side of the dashboard.

2. Click on the Recording icon for the service line that you would like to record calls.

3. You will first need to activate Call Recording. Toggle the menu option to the right from Status Off to Status On.

4. Then, turn on the AI Insights – Basic. This includes Call Transcription, Call Summary, and Sentiment Analysis.

call recording ai insights

Note: You can also add Call Translation below to automatically translate call transcriptions into your desired language.

5. Click Save Changes to confirm your request.

You will now have access to the AI Insights tab in the left-hand menu.

How To View Call Summaries From The AI Insights Dashboard

Follow these instructions to view call summaries from the AI Insights Dashboard:

  1. Click AI Insights on the left navigation bar.
  2. Choose the line where you’d like to view call summaries and apply relevant filters.
  3. Click on Display Report.
  4. Click on Summary in the Activity column to view the call summary.

select ai insights

Have questions? Contact your account manager today or chat with us online.

FAQs

  • Why can’t I see summaries for all my calls?

You will only see call summaries after the AI Insights and Call Recording features have been activated. Call summaries are only available for lines with call recording and AI Insights enabled.

How to View Missed Calls

You can view your missed calls through our control panel.

There are two ways to see missed calls:

  • My Phone Numbers Tab
  • Custom Reports

Here are the steps to see missed calls through the My Phone Numbers tab:

1. Log in to your control panel.

2. Click on My Phone Numbers.

3. Identify the phone number that you would like to see missed calls on.

missed calls service plan

4. Click on Service Plan.

5. Click Activity.

6. Select Missed.

missed call activity

Here are the steps to view missed calls using Custom Reports:

1. Once in the control panel, click on Custom Reports in the left-hand menu.

missed calls reports

2. Select the date range that you would like to view missed calls for (only 6 months of prior data is available for this report).

3. Choose the Virtual Number(s) which you would like to see missed calls for.

4. Select the Call Type: Missed.

missed calls report options

5. Click Display Report.

If you would like to call these people back using your virtual number as the caller ID, we offer an outbound calling solution.

I Am Receiving Spam Calls on My Phone Number

Occasionally, the phone numbers that we provide receive unwanted telemarketing and spam calls. Unwanted calls can cost money to the account owners.

To reduce spam calls, we hold previously owned numbers in a 6-month quarantine before re-instating them into inventory. In addition, we try to ensure that the number is not published anywhere on the internet. If we find that a number is published on the internet, we will return it to our provider. However, there are some instances where the numbers that we provide have a prior history.

If you’re receiving unwanted calls and would like them to stop, you have a few options:

Block Incoming Calls from Certain Numbers

We have a blocklist feature designed to prevent unwanted phone numbers from reaching you. You could either set up a blocklist or a whitelist.

Set Up a Basic IVR Menu

In many cases, telemarketing and spam calls are generated by auto-dialers and predictive dialers. These systems wait for someone to answer the call and then connect the call to a telemarketing agent. These systems usually cannot interact with an IVR menu.

If you’re receiving unwanted calls, you can set up an IVR menu that plays a message like “Thank you for calling, please press 1 to speak with someone.”

Contact Us and Request a New Phone Number

We recommend that you contact us if you start receiving a high volume of unwanted calls. Once confirmed, we will gladly swap the number out for you and return it to our provider.

How to Set Business Hours and After-Hours Routing

Business Hours & After Hours Routing

Business hours and after-hours routing use time-based routing technology to define specific time zone-based schedules for each of your phone numbers. You can configure business hours (e.g., Monday to Friday, 9 AM to 5 PM) and set IVR rules to manage how incoming calls are handled both during and outside these hours.

How to Set up Business Hours Routing

To configure business hours and after-hours routing, follow these steps in your control panel:

1. Log in to your control panel.

2. Select My Phone Numbers from the menu on the left side of the dashboard.

3. Click the Settings icon next to the phone number you want to update. settings
4. Underneath Call Forwarding, hover over Advanced Routing (⚪). To switch to Advanced Routing from Basic Forwarding, click the icon so it is selected (🔵), indicating that your call forwarding is set to Advanced Routing.

call forwarding to advanced routing tab

5. In the Forwarding Rules section, select Go to Rules.

6. When the Rule List page opens, click Create New Rule to get started.

time of day rule list

7. Enter a Description, choose the days of the week under On These Days, and set the Start and End Dates along with the desired time Interval.

rules and settings

If your business operates from 9:00 a.m. to 5:00 p.m., you can set up different routing rules for calls that arrive after 5:00 p.m.

8. Choose how to handle after-hours calls:

  • Forward all Calls to a different number or location
  • Send calls directly to Voicemail

forward calls, sequential option

To send calls to a different number or location: Add phone numbers under Forward all Calls for individuals or teams available to take after-hours calls.

Then, select the Call Method:

  • Sequential – rings numbers one after the other
  • Random – rings a randomly selected number
  • Simultaneous – rings all numbers at the same time.

9. Click Save Rule, and changes will take effect based on the chosen time zone.

Why Is the Amount Charged Different from the Plan I Selected? (Postpaid Accounts)

Postpaid accounts are charged a prorated amount for services over the remainder of the invoice period.

Example

For example, if you add a $12.95 service line on November 23rd, your account would be charged $3.45.

Related: I Need a Receipt for the Transaction or an Invoice for My Payment

Why Is the Amount Requested to Activate the Account More than the Plan I Selected

(Prepaid Accounts)

For Prepaid Accounts, we require upfront pre-payment for 1 full month of service fees plus the prorated fees for the current month.

Example:

If you sign up for a $12.95 per month service on November 23rd, and we request prepayment, you would need to pay $16.40 = $12.95 (1 full month of service fees) plus $3.45 (8 days remaining in the invoice period * (30 days in November/$12.95)).

I Need a Receipt for the Transaction or an Invoice for My Payment

What Happens After I Make a Payment?

After you make a transaction, we send an email to the email address that is registered on your account or during signup, with details about the transaction.

How to View My Transactions Online?

Your transactions are directly visible online in the control panel under the “current billing period.”

  1. Log in to your control panel.
  2. On the left side of the screen, click on Billing & Payments.
  3. View your payment history and/or download invoices.

If you have further questions, please contact us.

Related: How to Download Your Invoices

What Is a Prorated Fee?

What is a Prorated Fee?

Prorated charges are a partial charge for the time between starting the new service, or adding additional service lines, and the invoice date.

How is the Prorated Fee Calculated?

For example, if your invoice date is the 1st and you add a $12.95 per month service on November 23rd, you will be charged for the time between November 23rd and December 1st (your next invoice date).

  • ($12.95 divided by 30 days in the November invoice period) multiplied by 8 days between November 23rd and December 1st = $3.45 prorated fee


Why Was My Card Charged Several Times During the Month?

Your card could be charged more than once during the month for several reasons:

  • When a new service or service line is added, we charge the prorated fee of that line from the day it is activated until the end of the month.
  • When the outstanding balance/additional usage goes beyond a threshold on the account. By default, the threshold is $200.

If you have more questions about why your card was charged, please contact us.

Related: I Need a Receipt for the Transaction or an Invoice for My Payment

My Card Was Charged but I Haven’t Received Any Service

What Is a Pre-Authorization?

It is not a charge, but rather an authorization hold that was placed on your card. This is also known as card authorization or preauthorization.

No funds were debited, but a temporary hold was placed on the funds. This is to help us validate your credit card.

When Will the Authorization Hold Fall Off?

In the case of debit cards, authorization hold should fall off the account, thus making the amount available again, anywhere from one to eight business days after the transaction date. This will depend on the bank’s policy. In the case of credit cards, holds may last as long as thirty days, depending on the issuing bank.

If the charge remains on your statement for longer than that, please contact your bank to ask why the charge hasn’t been removed even though it has been voided.

Please contact us with any further questions.