With the Salesforce CRM Softphone extension, you can use your Global Call Forwarding Softphone within your Salesforce CRM pages to make and receive phone calls.
Note: This Salesforce CRM extension only works if:
- You are an existing customer of Global Call Forwarding
- Have an active Outbound Calling plan and PIN, and
- Have activated the option for Salesforce-GCF Softphone integration (license) within the control panel.
- New users can add the Salesforce softphone integration to their GCF service for a $10/month fee per user.
- New users have a 30-day free trial from the date of initial activation for each line.
- This integration works with the Microsoft Store version of the GCF softphone for Windows PCs.
- This integration can be activated and canceled at any time from the account control panel.
Learn more about the benefits of the Salesforce phone integration here.
How to Set up Salesforce Softphone Integration
Each user selected must go to their Salesforce CRM and install the GCF Softphone extension:
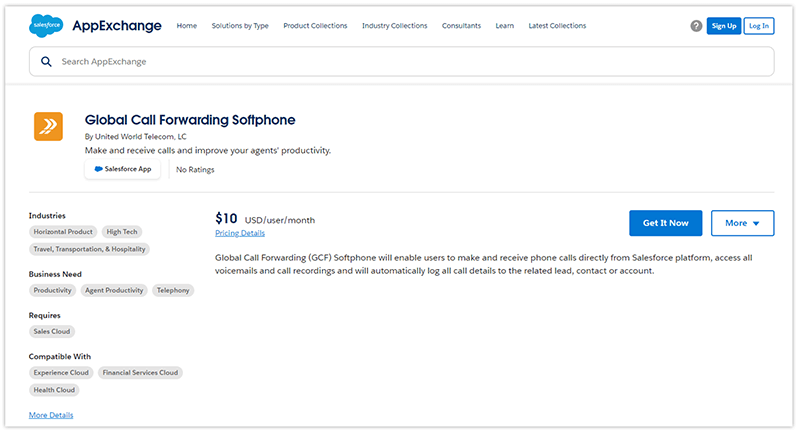
1. Log in to your Salesforce account. Then, go to Salesforce AppExchange. Search and install the Global Call Forwarding Softphone.
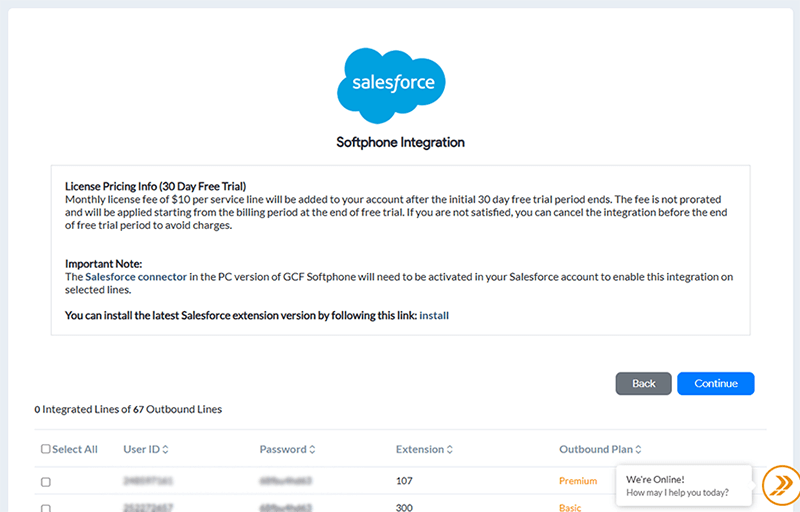
2. After the installation is completed, a screen will appear requesting the corresponding Global Call Forwarding Outbound Calling credentials. To find your Outbound Calling credentials:
- Log in to your Global Call Forwarding control panel.
- Click Outbound Calling on the left-hand side of the control panel to reveal all outbound lines.
- Your UserID for each outbound calling line will be displayed under the UserID column.
- Click the desired User ID or Settings icon and under the User Options tab, you can view your Line credentials: Password for this line.
Enter the relevant User ID and password to connect Salesforce and Global Call Forwarding.
How to Use the GCF Softphone within Salesforce
Once the credentials are entered, a ‘phone’ icon will appear at the bottom right corner, click on it.
A menu will open your softphone app or simply click on the green ‘phone’ icons beside every contact’s phone number to instantly place a call to that number using your softphone extension.
Familiarize yourself with the softphone in our How to Use the GCF Softphone guide.
Advanced Settings
Note that the GCF Salesforce app only works in Salesforce Lightning modules. To activate the GCF Salesforce app in your desired module, follow these steps:
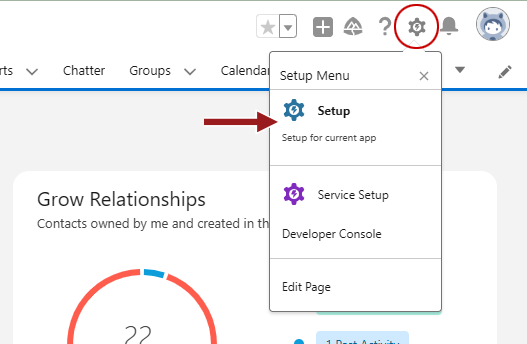
1. Click the gear icon on the top right corner of the page and choose Setup.
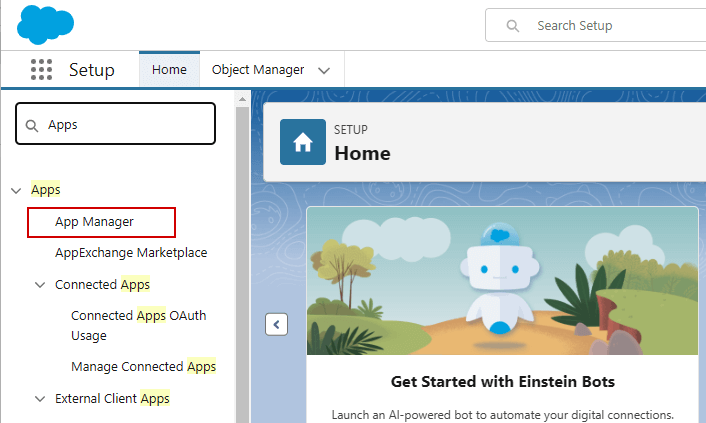
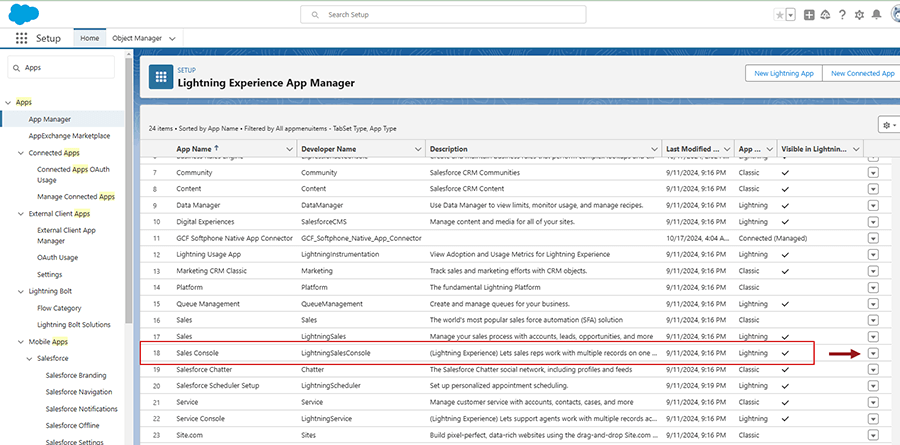
2. In the Search field, type in Apps and click on App Manager.
3. Choose a module in which the GCF Softphone should be accessible. It must be a Lightning module under the App Type heading. Click on Edit on the far right of your desired module.
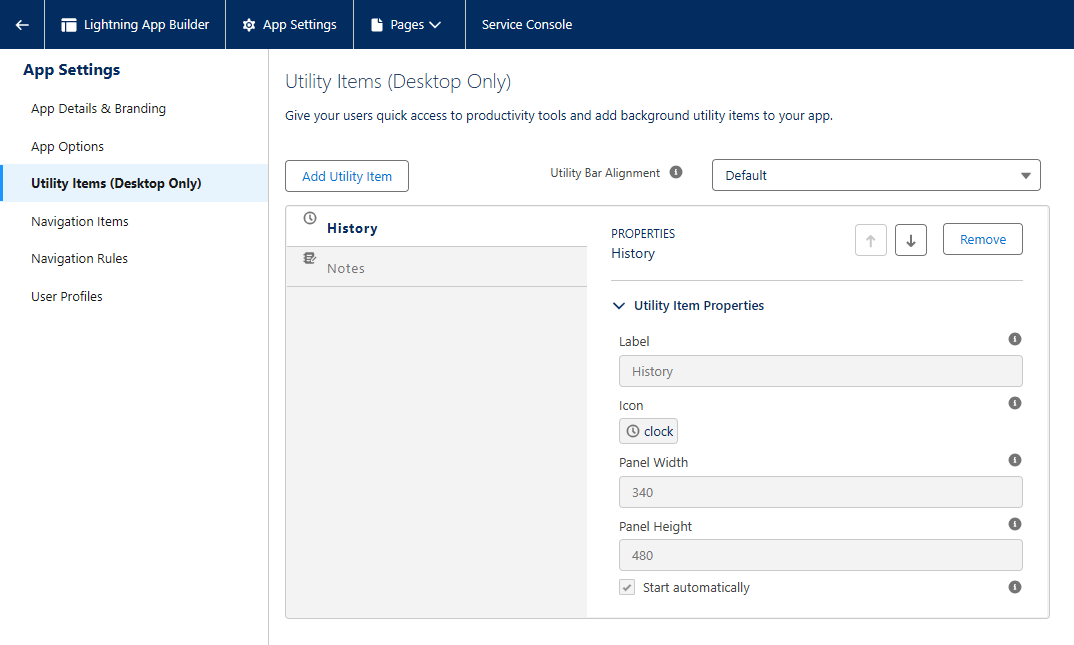
4. Then, click on Utility Items (Desktop Only).
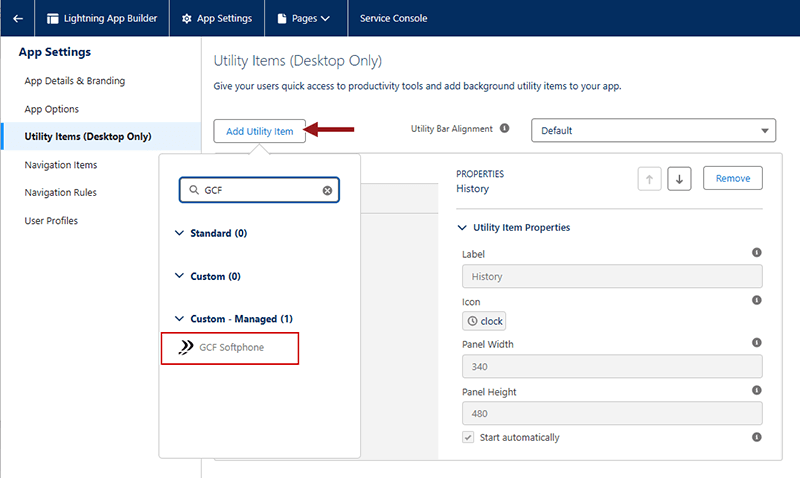
5. Click the Add Utility Item button. Search for and click on GCF Softphone from the results. Note: Do not touch the setting under Utility Item Properties.
6. Then, click on Save. Now the GCF Softphone is installed in that module.
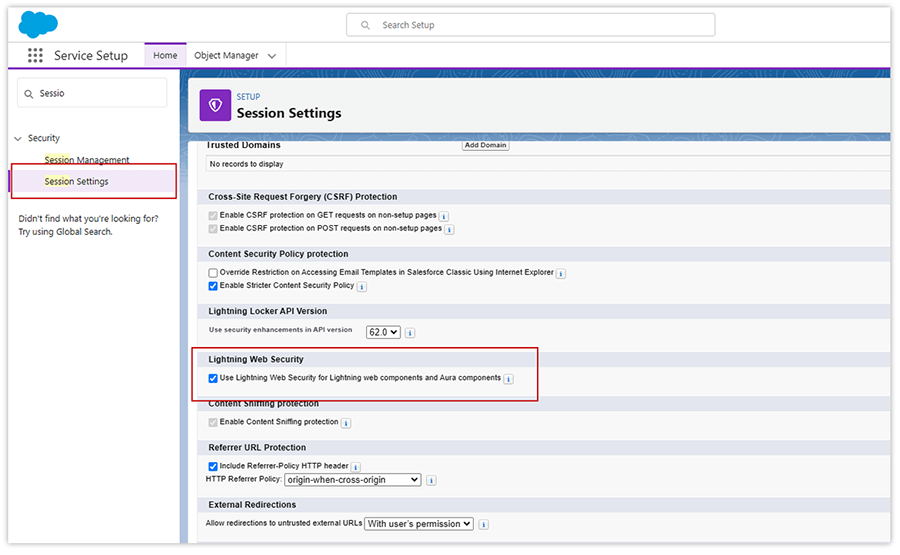
If you are still unable to view or use our integration, please make sure you have the Lightning Web Security box checked. To do this,
1. From your module’s Home page, click the gear icon on the right and select Service Setup.
2. From the left navigation menu, search for and click on Session Settings.
3. Then, scroll down to Lightning Web Security and check the box.
4. Click Save to save your settings. This change takes about 30 minutes to come into effect. Please clear your browser’s cache to ensure changes take effect.
Note that if your Salesforce account is using other third-party apps within the account, those apps may be affected with that box checked.
For any other questions, contact your account manager or tech support for assistance.