Global Call Forwarding makes phone number management easy with our array of call features and user-friendly online control panel. From phone number ordering to managing features for specific lines, you can conveniently manage phone numbers and control your call flow with our service.
In this guide, we will take you through a few phone number management essentials, such as how to:
- Add new numbers to your account
- Port a number to our service
- Use our phone number API
- Change your forward-to phone number
- Create custom routing rules
- Set up an IVR and call flows for different phone lines
1. Add New Phone Numbers and Lines to Your Account
You can add new phone lines by:
- Purchasing phone numbers from our website,
- Purchasing numbers from your control panel (log in here), or
- Speaking with your account manager.
New customers can purchase new phone numbers from our website by filling out the form on our Pricing page.
To purchase numbers from the website:
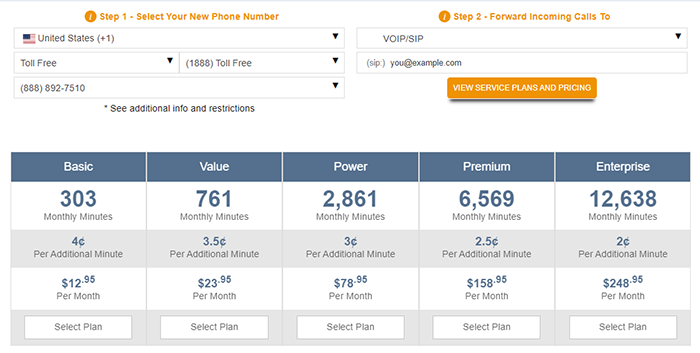
- Visit our Pricing page.
- Select your new number from the left dialog box — Choose the country, type of number, prefix, and number available.
- Then, enter the necessary information in the right dialog box to have your calls forwarded.
Note: You can forward calls to any location or VoIP/SIP system. - Click on View Rates and choose from our five different plans.
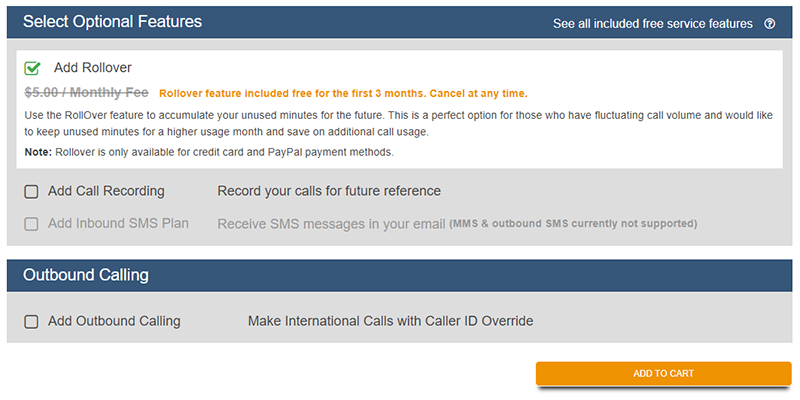
- Add premium services, if desired. We offer Call Recording, Outbound Calling, RollOver Minutes, and an Inbound SMS plan.
- Click Add to Cart.
- Fill in the remaining information, submit your order, and wait for your service to be activated.
To purchase numbers from the Control Panel:
1. Log in to your control panel.
2. Click My Phone Numbers on the left-hand side of the page.
. Click on the Add Phone Number button on the top-right side of the page.
Note: Alternatively, you can click on Add Service Lines from the left-hand panel and choose a Call Forwarding or Outbound Calling line. From there, use the phone number ordering form and follow the prompts to get a new service line.

4. Using the form on this page, you can select the number you want to purchase.
5. From the left dialog box, Select Your New Phone Number, select the country for your desired number.
6. Next, select the type of virtual phone number you want for your business (local, toll-free, international toll-free, and vanity numbers). Pick the prefix and number available.
7. Then, enter where you want calls forwarded in the right dialog box Forward Incoming Calls To.
8. Next, review plans and pricing for this number.
9. Scroll down to add optional features such as RollOver, Call Recording, Inbound SMS Plan, and Outbound Calling.
10. Click Add to Cart.
11. On the Checkout page, review your cart. Here, you can choose to Add More Numbers or Submit Order.
For more information, check out our post on How to Purchase / Add New Phone Numbers.
2. Porting a number to our service
Want to add an existing phone number to the Global Call Forwarding network? You can port a number to our service by filling out a number porting request form or speaking with your account manager.
3. Using our phone number API
With our Voice and Phone Number API, you can look up numbers available for purchase. With a few lines of code, you can get a list of countries and cities where local, national, or toll-free numbers are available and directly purchase the numbers you need.
4. Change your forward-to number
With time, you may need to change or update your ‘forward-to’ number. You can easily change this information within the control panel:
- Log in to your control panel.
- Click My Phone Numbers on the left side.
- Click on the 3 dots to the right and select Settings of the service line you want to change.
- Select Call Forwarding from the horizontal menu and click Basic.
- Change the number in the field under Forward all calls to, and click Save.
5. Add routing rules
Need to send calls to multiple teams and users at the same time? Or, want to route calls to different locations during certain times of the day? You can customize the way calls are routed within your phone system with advanced call routing.
Here are some routing strategies you can use with our service and how to set them up within the control panel:
- Time-based routing
- Location-based routing (Geo-routing)
- Sequential forwarding
- Simultaneous ringing
- Holiday routing
6. Set up IVR and call flows for different phone lines
You can configure IVR (auto-attendant) to greet callers, offer a predetermined list of menu options, and route callers to the appropriate extension — all with our call flow builder.
Here are the steps to configure IVR:
- Log in to your control panel.
- Click My Phone Numbers on the left-hand side of the page.
- Click the 3 dots to the right and select Settings on the phone line you would like to modify.
- Then, select the Call Forwarding tab, and under that, click on IVR.
- Click the Manage IVR Applications to customize your IVR processes in our IVR call flow builder.
- Here, you can add voice prompts, phone numbers, and email addresses (on the right side).
- Click on Create New Application and select User Menu to start building your IVR menu.
- Once you build your IVR application, click Close on the bottom right and then Save.
Here are some resources on setting up your IVR system and using our call flow builder.
Need more help? Our account management and tech support team are always available to assist you in creating a well-functioning phone system. Speak with your account manager or chat with tech support!