What is Geographic Routing?
Geographic routing—also known as location-based routing and geo-routing—is an advanced IVR routing service that lets you forward calls based on the location of the caller.
For example, you can route incoming calls from a certain country (Thailand) to your support center in that region (Asia).
Related: How to Create a Call Flow in the IVR Manager
How to Set up Geo-Routing?
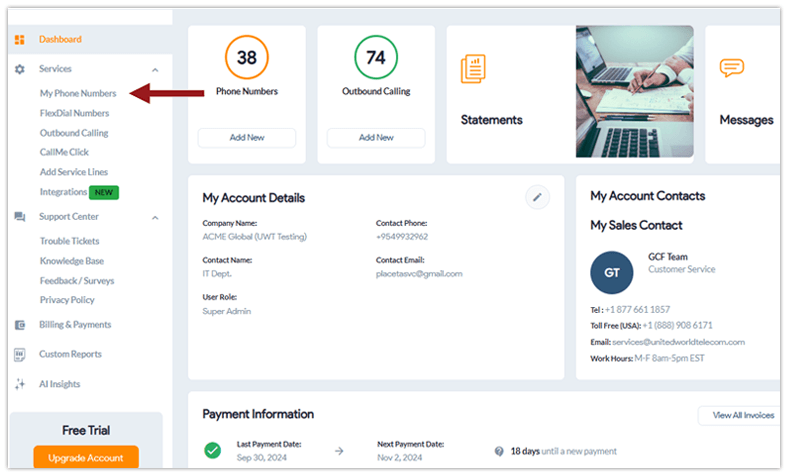
1. Sign in to your control panel.
2. Under Services, click on My Phone Numbers, located in the page’s left-hand menu.
3. Go to the Settings icon next to the line you want to edit.![]()
4. Underneath Call Forwarding, hover over IVR (⚪). To switch to IVR from Basic Forwarding, click the icon so it is selected (🔵), indicating that your call forwarding is set to IVR.
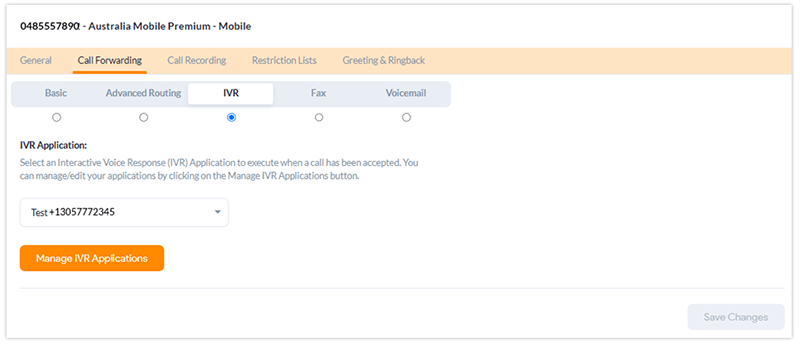
5. Click Manage IVR Applications to customize and configure your IVR settings.
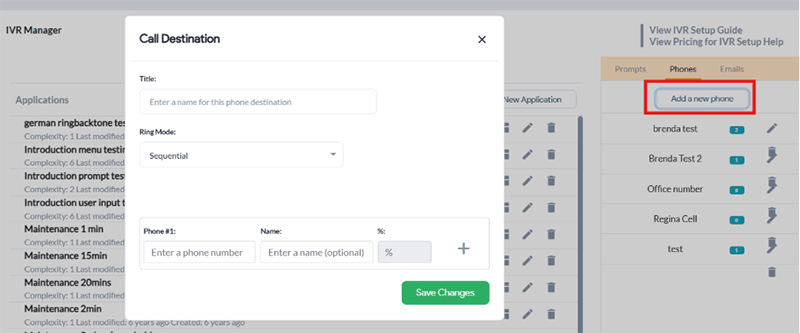
6. Next, click on the Phones tab. Here, you can set up a list or ring group with multiple destination SIP addresses or phone numbers. Choose the Ring Mode and set up Weighted Distribution (if desired) for this group, and click Save Changes.
7. Click on Create New Application on the IVR Manager page and choose Caller ID Routing.
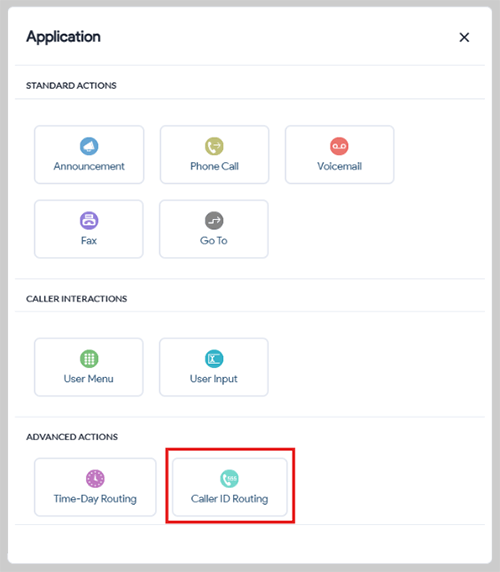
8. Name your new application and click on the edit button to customize the routing rule.
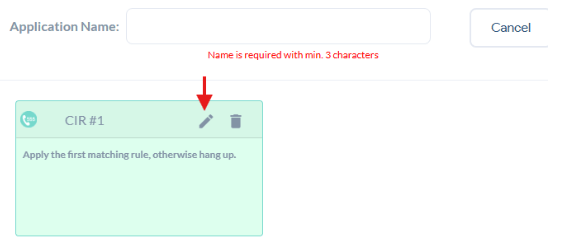
9. Now, give this rule a name. Here, you will configure Invalid and New Rule triggers for this caller ID routing rule.

10. First, start with the Invalid rule. Click it to open up the list of actions. Here is where you decide what happens if someone outside your desired location, regions, and caller IDs calls.
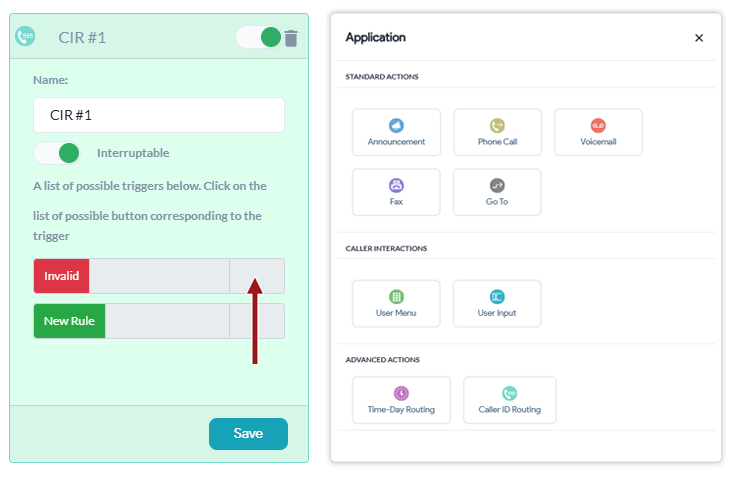
You can choose to send them to Voicemail, or play an Announcement, or use the Phone Call trigger to route them elsewhere like remote agents or a call center.
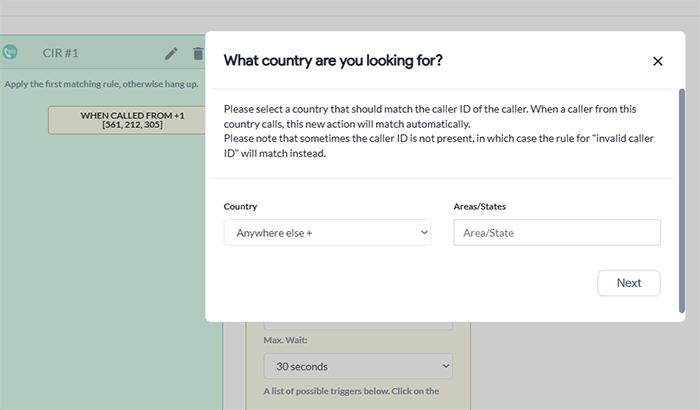
11. Next, set up a New Rule for your target locations and caller IDs. When you click on New Rule, you will be able to choose the country you want to include in this rule.
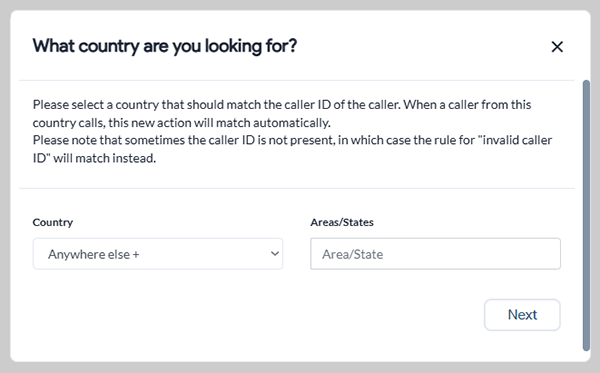
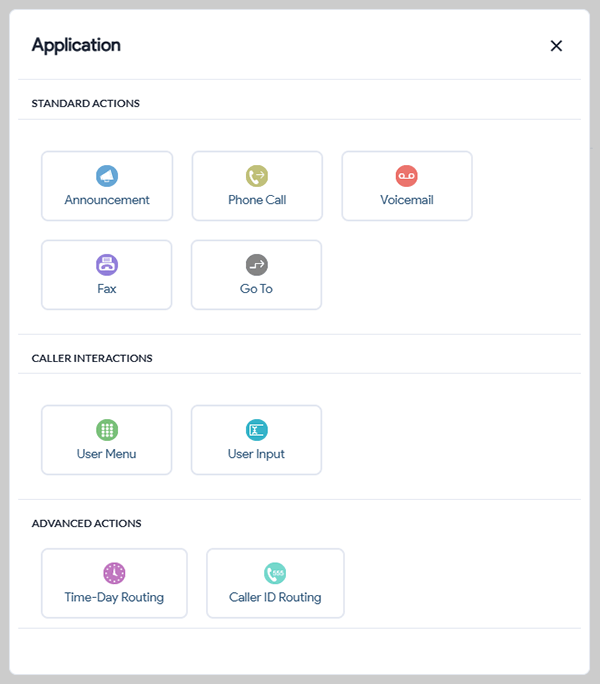
12. Then, click Next to choose what happens to callers calling from your selected country. Pick your action from the list of actions.
13. Now customize your routing rule:
- Select a prompt (if needed) from the pre-recorded and uploaded options. You can add prompts in the right-side menu.
- Choose a Destination — either a ring group or a phone number — where you want to forward the call. You can set up this ring group through the right-hand menu under Phones.
- Select a Ringback tone — either the default or one specific to the country where the calls will be routed.
- Determine the Wait time before a call is considered failed or moved to a backup trigger.
Here’s an example: Set Country to Paraguay +595 and use the Phone Call action to send incoming calls to your Emergency sales team.
14. Click Save at the bottom of the new card to save your changes.
15. You can also set another rule to the same IVR which will be applied when callers call from Anywhere else + to cover all your bases, or to support callers from another location.
16. You can also send calls to Voicemail, Fax, Announcement, or User Menu for further customization.
17. When done configuring your Caller ID-Based IVR, click Save Application on the top by the Application Name.
Benefits of Using Location-Based Routing for Improved Caller Experience
- Simplified call process and channels incoming call traffic based on location.
- Offer one number for multiple locations.
- Provide customer support in their time zone and region.
- Offer 24/7 global customer support.
- Use an efficient, automated service for improved call management.
- Access to call tracking and local call reports.
- Directs international call traffic to specific locations.
- Easy to use and quick set up through the control panel.
Is Geo-Routing Right for You?
Set up geo-routing for your business to better manage your global customer support system. This way, customers can get help in their time zone and even their language. Want to learn more about call routing strategies, speak with one of our experts today!