Users may configure IVR (interactive voice response) to greet callers, offer a predetermined list of menu options, and route callers to the appropriate extension. IVR is included free with our business phone service and can be set up from the control panel.
In this guide, we’ll look at:
- How to Set Up Advanced IVR?
- Setting Up IVR With User Menu
- Setting Up Time-of-Day Routing Through IVR Manager
How to Set Up Advanced IVR?
1. Sign in to your control panel.
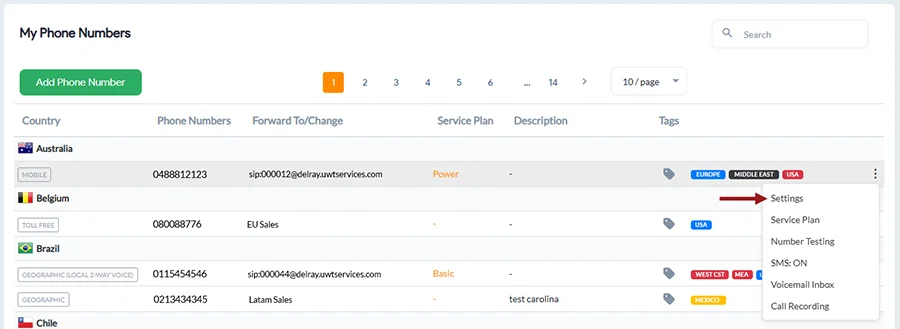
2. Under Services, click on My Phone Numbers, located in the page’s left-hand menu.
3. Go to the dots on the far right and select Settings next to the line you want to edit.
4. Underneath Call Forwarding, hover over IVR (⚪). To switch to IVR from Basic Forwarding, click the icon so it is selected (🔵), indicating that your call forwarding is set to IVR.
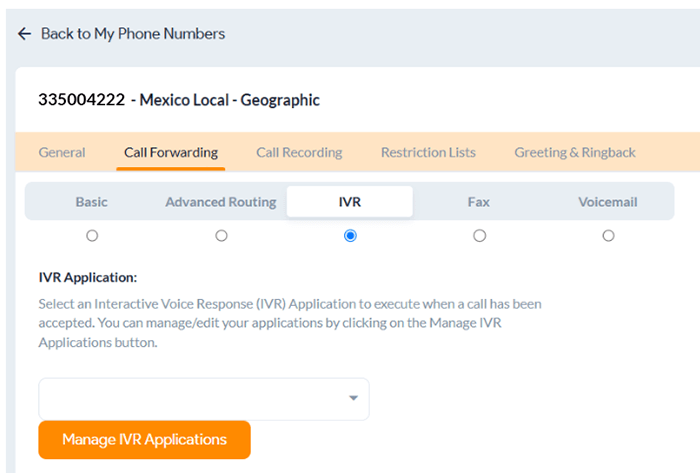
5. Click Manage IVR Applications to customize and configure your IVR settings.
Now, before setting up the IVR, you will need to configure prompts and destinations that you will add to your IVR system. Here are the steps:
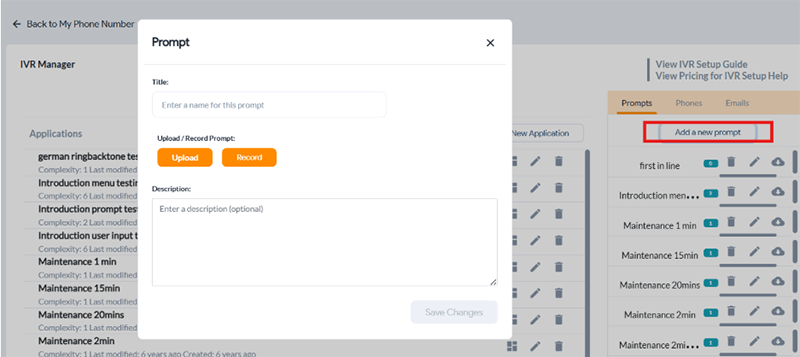
a) For Prompts — This is the message customers will hear when they connect with your phone system. To guide them effectively, you can include company details, announcements, updates, or navigational instructions. Example: Opening greeting or IVR main navigation menu.
Go to the Prompts tab and click Add a New Prompt. Here, you can Upload/Record a new prompt or voice message. Then, click Save Changes.
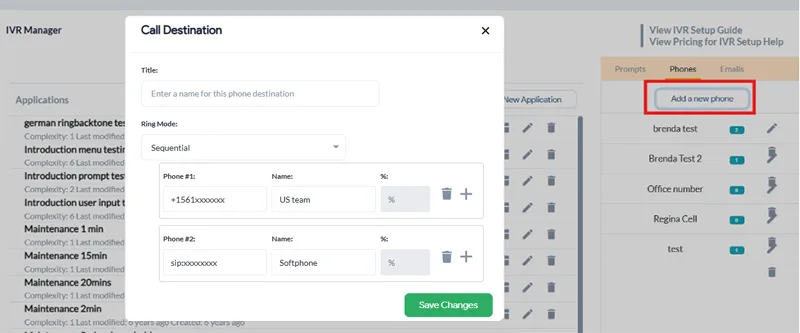
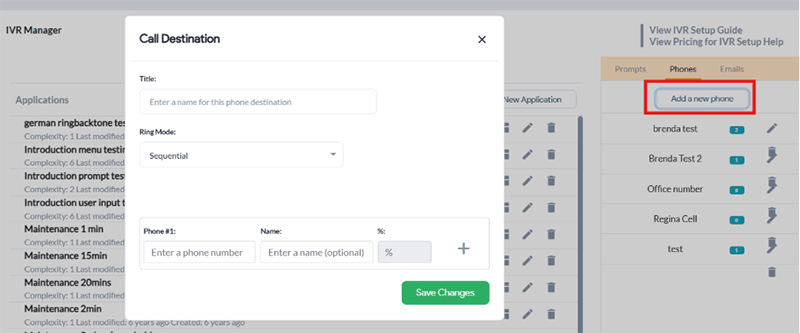
b) For Phones — Here, you can set up a list or ring group with multiple destination SIP addresses or phone numbers. Pro tip: Save the title with a descriptive name such as Customer service team UK for your service team in the UK. If it is an individual, then save it as [name] + phone number + location. Example: Peter phone number UK.
Click on the Phones tab, click Add a new phone, and enter a title for this ring group. Next, choose a Ring Mode:
-
- Sequential, where calls are sent to numbers one after the other
- Random, where a number from the list is selected at random to receive the call
- Simultaneous, where all numbers ring at the same time until someone answers.
Then, add your preferred destinations under Phone #1, Phone #2, etc — this is where the calls will be forwarded through the IVR. You can enter phone numbers or a SIP addresses (eg, sip:xxxxxxxx) and also adjust weighted call distribution with percentages, if desired.
Pro tip: To use the IVR to forward calls to a softphone, add the relevant SIP address sip:xxxxxxxx (this number will be your Outbound Calling User ID). Learn how here.
Click Save Changes.
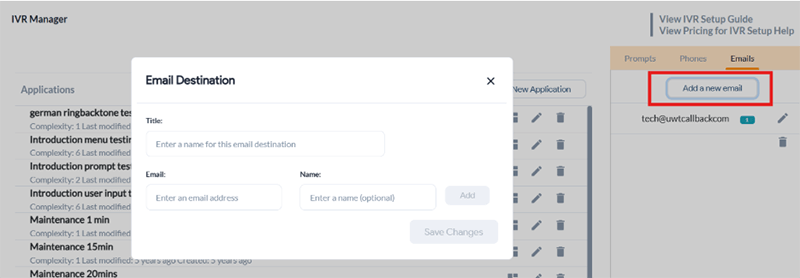
c) For Emails — Here you can enter email addresses where you want voicemail messages to be forwarded to. Example: Peter email address or Billing email addresses. This way, you can potentially send incoming fax messages and invoices directly to your Billing directly.
Click on the Emails tab and select Add a New Email. You can create a list with one or more email addresses from here. Then, click Save Changes.
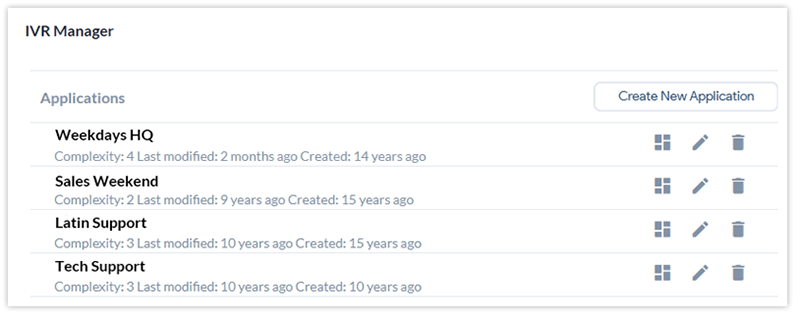
6. With all this set up, you can now create your IVR system. Start by clicking Create a New Application on the same IVR Manager page to get started:
Setting Up IVR With User Menu
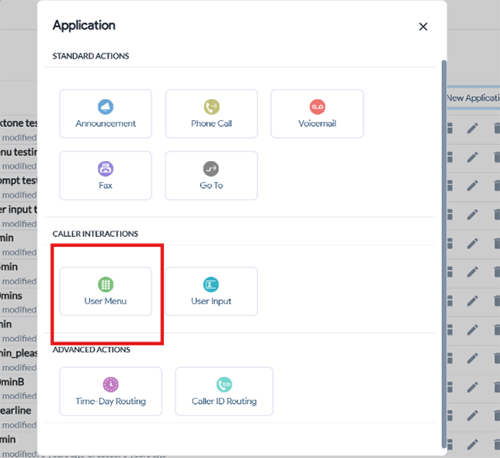
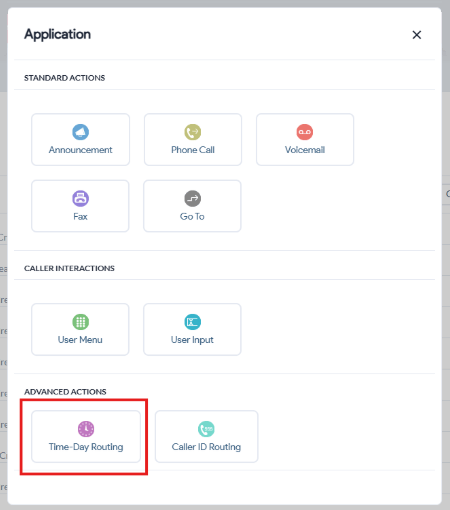
7. An Application menu screen will appear, select User Menu to build an IVR with menu options that callers will listen to and interact with.
8. Now, start filling the green card below with your requirements:
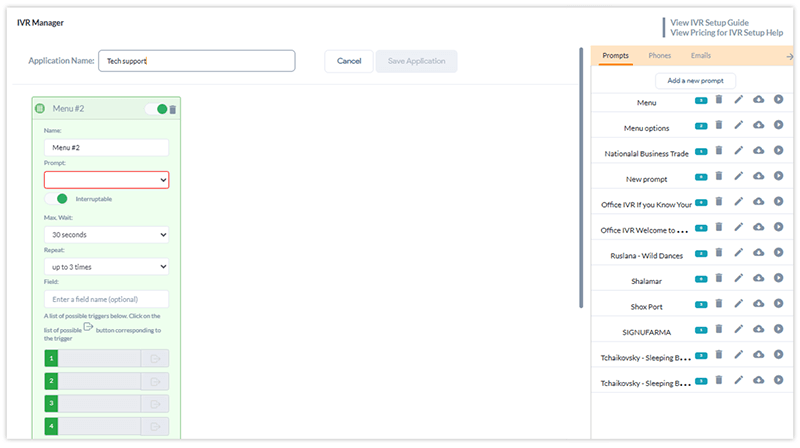
- Prompt: The main voice message welcomes callers and provides them with various menu options. Select from the prompts you’ve uploaded or recorded earlier.
- Interruptable Option: Choose whether callers can interrupt the message or must listen to it in full.
- Maximum wait period: The maximum duration callers will wait before the system takes action.
- Repeat: Number of times the message will repeat
- Possible trigger for each key (number on the keypad): Select from various actions and triggers, and assign each key (1, 2, 3, etc.) to a specific target, such as a hunt group, department, voicemail, or a list of email addresses. You can utilize the phone numbers, SIP addresses, and email lists you’ve created here. The available actions and triggers are as follows:
- Phone Call: Redirect the call to another number, department, team, or hunt group.
- Announcement: Play a pre-recorded voice message or announcement to the caller.
- Voicemail: Route the call to voicemail.
- Time-Day Routing: Direct calls to specific locations or numbers based on designated times or days.
- Caller ID Routing: Forward calls from specific locations or area codes to selected numbers or groups.
- Invalid: Select the action to take when the caller presses an incorrect key or number.
- Timeout: Choose what happens when the message repeats the desired number of times, but the caller does not press a key.
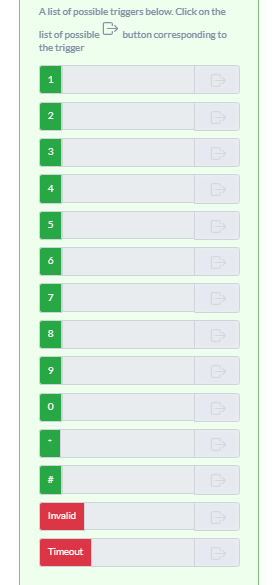
Here’s an example: #1 directs the call to the customer service department list, #2 sends it to the billing department, and #3 forwards the call to voicemail. If the caller cannot find the correct option in the menu and doesn’t press any key, you can redirect them to voicemail and allow them to leave a detailed message for further assistance.
9. Finally, click Save.
Have more questions? Please contact us via phone or live chat. We are happy to help customers with their IVR setup.
Setting Up Time-of-Day Routing Through IVR Manager
1. Under Services, click on My Phone Numbers, located in the page’s left-hand menu.
2. Go to the Settings icon next to the line you want to edit. ![]()
3. Underneath Call Forwarding, hover over IVR (⚪). To switch to IVR from Basic Forwarding, click the icon so it is selected (🔵), indicating that your call forwarding is set to IVR.
4. Click Manage IVR Applications to customize and configure your IVR settings.
5. Next, click on the Phones tab. Here, you can set up a list or ring group with multiple destination SIP addresses or phone numbers. Choose the Ring Mode and set up Weighted Distribution (if desired) for this group, and click Save Changes.
Pro tip: Save the title with a descriptive name, such as Customer service team UK for your service team in the UK. If it is an individual, then save it as [name] + phone number + location. Example: Peter phone number UK.
You can create multiple “destinations” like this where you plan to route incoming calls for this time-based rule.
6. With the destinations set up, click on Create New Application on the IVR Manager page and choose Time-Day Routing.
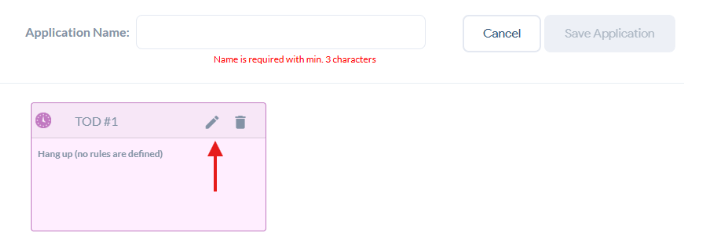
7. Name your new application and click on the edit button to customize the routing rule.
8. Next, give this rule a name and select your desired time zone from the dropdown.
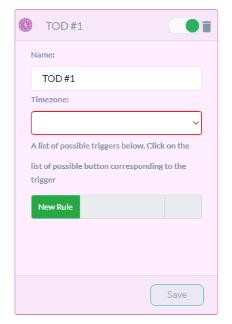
9. Then, click on New Rule to configure time-based routing. Specify the days (under On These Days) and Time range you want the calls to be forwarded. Click Next.

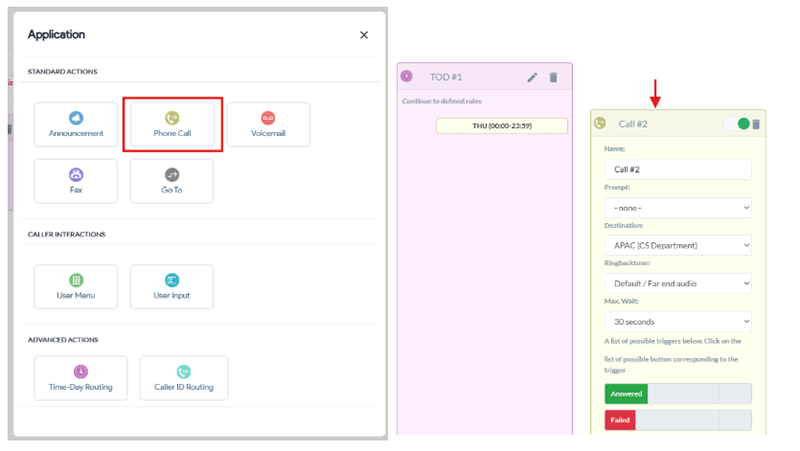
10. Now pick the action this rule should follow. For instance, if you want calls to forward to your APAC team during this time-based rule, you can select Phone Call and then customize the next card with the correct destination (in the example’s case – APAC ring group).
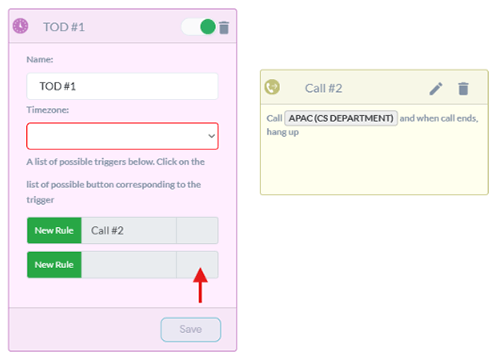
11. To add another time-based rule to the same IVR, you can go back to the first card and add a New Rule.
12. You can also send calls to Voicemail, Fax, Announcement, or User Menu for further customization.
13. When done configuring your Time-Based IVR, click Save Application on the top by the Application Name.
Related: