This document outlines the process to integrate Genesys PureCloud with our Session Border Controller (SBC). With this SIP integration, you can route, manage, and scale voice traffic globally from within Genesys Cloud.
To see instructions for configuring SIP within Genesys, check out our Genesys SIP Forwarding guide.
Below, we display instructions for our United World Telecom’s end of the Genesys integration. Additional resources from Genesys:
- https://help.mypurecloud.com/articles/create-a-byoc-cloud-trunk/
- https://help.mypurecloud.com/glossary/e-164
- https://help.mypurecloud.com/articles/number-plan-information
Contact your account manager or our tech support for any additional assistance during setup.
Setting Up Genesys SIP Integration with United World Telecom
In this guide, we’ll cover the following:
- Configure an External Trunk
- Set Up Inbound Calling
- Set Up Outbound Calling
- Set Up Number Plan
- Make Outbound Calls
Configure an External Trunk & Set Up Inbound & Outbound Calling
Follow these steps to integrate Genesys with our SBC:
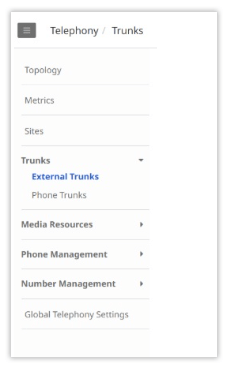
1. In your Genesys portal, click Admin and under Telephony, choose Trunks. Select External Trunks.
2. Click Create New. In External Trunk Name, enter a trunk name.
3. From the Type lists, select the type and subtype for the BYOC Cloud trunk you want to create.
4. Set Trunk State to In-Service. From the Protocol list, select UDP.
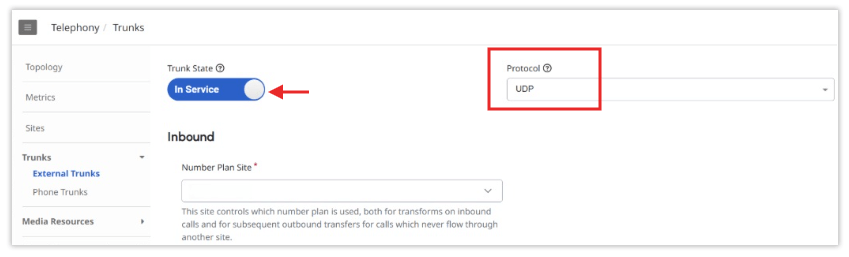
5. In the Inbound section, select your Number Plan Site. This setting allows you to identify the site with the number plan that you want to use. For more information, see: https://help.mypurecloud.com/?p=309444
6. Under Inbound SIP Termination Identifier, put the 9-digit User ID provided by your UWT / GCF Account Manager. This is the User ID of the Outbound Line you want to integrate with Genesys. You can find more information on Outbound User ID and Password credentials here.

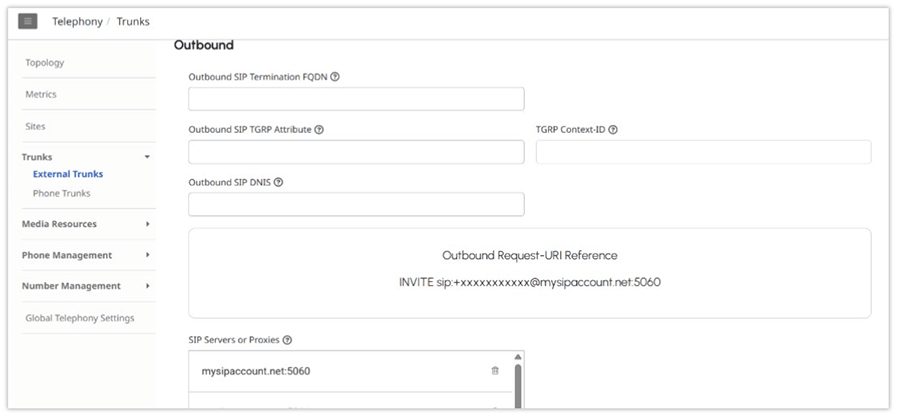
7. In the Outbound section, in the SIP Servers or Proxies box, enter our SIP Server mysipaccount.net or asia.mysipaccount.net. You will also need to add these IPs to receive traffic through our network: 5060/5061.
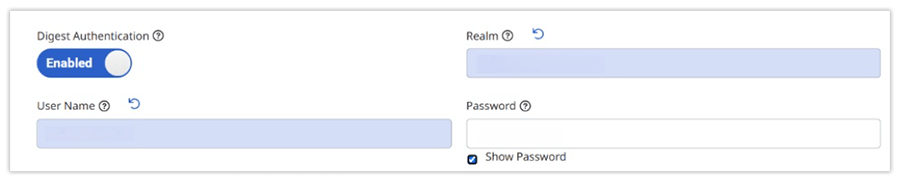
8. Enable Digest Authentication and put your username and password too. These are the same credentials used in step 6 and will authenticate the outbound SIP.
9. Click Save External Trunk.
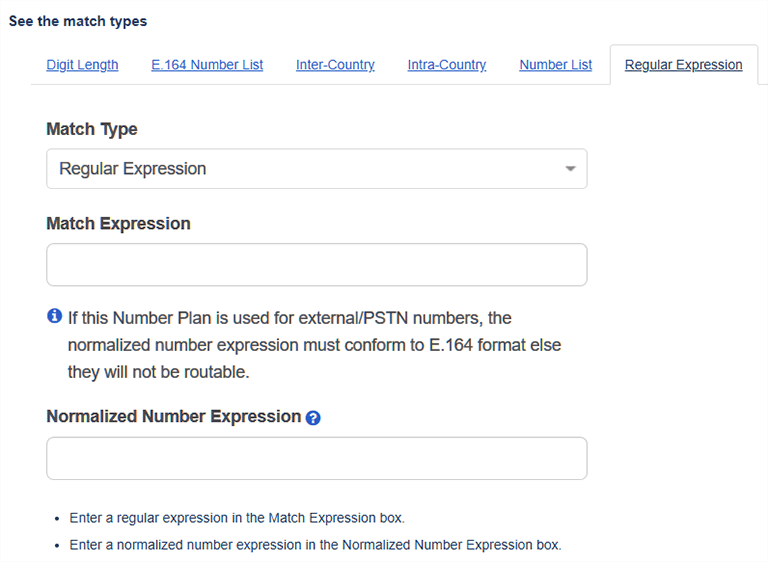
Set Up Number Plan
Set up a number plan to properly process phone numbers with the correct format. Here are instructions to add a number plan:
- Click Admin.
- Under Telephony, click Sites.
- Select your site from the Site Name list.
- Click the Number Plans tab.
- Click New Number Plan.
- Enter a name in the Number Plan Name box.
- Select one of the available match types from the Match Type list.
- Depending on what match type you select, enter the required information.
- Select the correct classification or enter a new classification in the Classification list.
- Click Save Number Plans.
Note: For external outbound calling, you may need to select Regular Expression for the Match Type to ensure the right dialing format is used.
For example, if calling out to Japan:
- Match expression- ^\+81(\d{9,10})$
- Normalize Expression: 01181\
This means:
- ^\+81 matches the +81 at the start (Japan)
- (\d{9,10}) captures the rest of the number (e.g., 123456789)
- So, \1 = 123456789
01181 + 123456789 → 01181123456789
More information: https://help.mypurecloud.com/articles/number-plan-information
Making Outbound Calls
When placing outbound calls, remember to update the following:
1. Put your 9-digit User ID as Caller ID. (This is the same User ID credential used in step 6).
-
- Under Calling, specify the Caller Address and Caller Name for the trunk
2. Dial the phone number you want to call with the country code and in the E.164 format.
If issues arise during integration, contact your account manager or our 24/7 live tech support through chat.