Our Scheduled Reports feature lets users schedule custom reports and receive them in their inbox at their convenience. Here’s how you can schedule a report in the control panel:
1. Log in to your control panel and open up the Dashboard
2. Go to Custom Reports from the left sidebar in the control panel. Here, you will see the Generate Reports tab and the Scheduled Reports tab.
3. To schedule a report in the Generate Reports tab, click the green Schedule Report button.

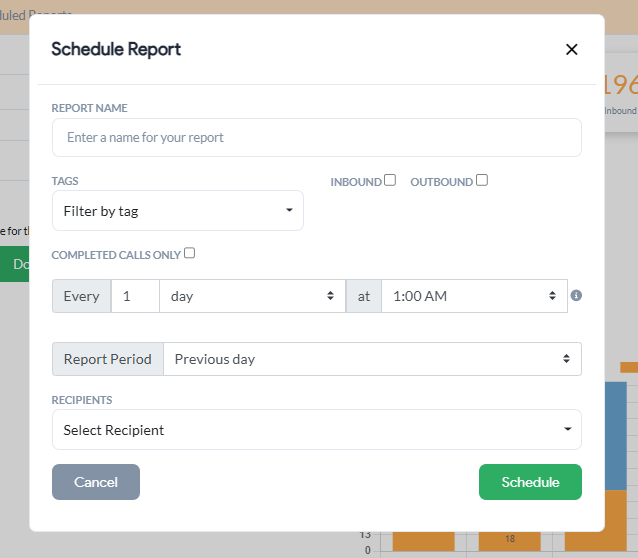
4. Enter the following information:
- Report name: Give your report a unique title.
- Phone Tags: Choose tags to filter and categorize your report.
- Inbound / Outbound: Choose which phone lines should be considered for this report.
- Complete calls only: Uncheck this if you want to also include missed calls and incomplete calls in your report.
- Frequency: Adjust this to reflect how often you want to receive this report.
- For example – To receive a report at the beginning of every month, you can configure the setting as – Every 1 month on 1st at 10:00AM.
- Report period: What period should this report cover?
- Following the previous example, if you want to see the previous month’s report at the beginning of a new month (i.e. see July’s call activity report on Aug 1st), you can configure the setting as – Previous month.
- Recipients: Who will receive this report?

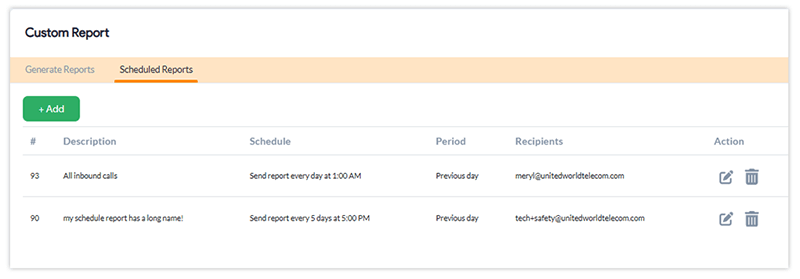
5. When ready, click Schedule to schedule the report. Once scheduled, you will be able to see and modify this report in the Scheduled Reports tab.

You can also schedule a report in the Scheduled Reports tab by clicking the green + Add button.
Related: